Why is it important to keep your hamstrings healthy? They help us in daily activities like walking, running, jumping, etc. They are also on the list of the most common sports injuries.
Whether you are a runner that overuses your hamstrings or you are more sedentary sitting for long periods of time underusing your hamstrings, you may have noticed discomfort while stretching tight hamstrings.
Your hamstrings are a group of 3 muscles (biceps femoris, semimembranosus, semitendinosus) located on the back of your thighs. They arise from your sit bones (ischial tuberosity) and insert into the bones of your lower leg (short head of biceps femoris arises from the back thigh).
In my video tutorial, I’ll provide a total of 17 ways to healthier hamstrings!
3 ways for you to see how your hamstring flexibility is while also stretching them.
3 ways to release the opposite muscle groups that tend to be overworked and tight.
3 ways to release your hamstrings
7 different bridge variations to strengthen your hamstrings.
1 more way to stretch your hamstrings
Assess your hamstrings:
Are you able to touch the floor while bending down from a standing position?
I show an option with an elevated box if you are tight, try to use a chair.
Runners stretch
You can use 2 yoga blocks under your hands to assist if you are tight.
Are you able to sit on the floor with knees extended and sit up on your sit bones?
I show a ball prop but you may have to start sitting in a chair or propped up on a yoga block to elevate the pelvis.
Tight hamstrings can pull the pelvis down into a posterior tilt which can lead to flattening of the lumbar lordosis.
What if you can touch the floor with no problem? So it’s not a tightness of the hamstrings issue but more of an “I can’t feel any tone or find my hamstrings” situation?
The hamstring’s primary action is to help you bend your knee and extend your thigh behind you. The opposite muscle groups that flex your hip and extend your knee may be so tight that they are not allowing the hamstrings to do their work.
Front of hip releases with massage ball & foam roller:
Psoas release with prone hip extension -10x each side
Rectus femoris release with knee bends, then continue down the front of the thigh.
TFL release
Hamstring releases with a foam roller and small ball:
In addition to releasing your hamstrings, this can help release your iliotibial band, improve knee tracking & hip function and strengthen shoulders & core.
2 legs on a foam roller
1 leg with the other leg crossed on top
Small ball under sit bone
Front and back
Side to side
Circle around the sit bone & reverse
Inch your way down going side to side all the way down to right above the back of the knee
Once you’ve tried out the release work I show how to strengthen your hamstrings with beautiful bridges. They not only strengthen your glutes and hamstrings but they open up your hip joint!
*note if you are cramping, come out of your bridge to stretch.
Flat Back Bridging helps you increase the stability of your spine & strengthens your erector spinae, glutes & hamstrings.
Round Back Bridging helps mobilize your spine & strengthen your back body.
Bridge Marching strengthens your hamstrings & glutes & increases lumbopelvic stability; option to add a resistance band around thighs (not shown)
Single leg Bridge w/one foot on yoga block – try up and down
Bridge marching on a foam roller
Bridge with legs on fitness ball straight – add in leg lifts or go up & down
Bridge with fitness ball – up, legs out & in & down
Finally, it’s time to stretch your hamstrings with a resistance band.
17. Supine stretch with band
If you want more exercises to help keep your hamstrings healthy check out my March MATness tutorials!
When you walk and have good ankle mobility you can flex your foot sufficiently to activate your glutes, pelvic floor, and your hip goes into extension. YAY!
Think for a moment how many steps you take in a day?
Many of us have some sort of tracker measuring our steps in a day. Companies incentivize their employees to get out and walk. exercise, etc.
Walking is an important activity to move about in our daily lives and enjoy the outdoors, trails, etc.
So what happens when you lack ankle dorsiflexion, the act of raising the foot upwards towards the shin?
Your heel will lift off too soon in your stride resulting in the glutes not firing to extend your hip and then your pelvic floor doesn’t go to the full range of motion that it is designed to.
Your intelligent and efficient body will compensate naturally, which in turn can cause issues elsewhere.
You will still walk forward however it’s not coming from the right places. Maybe the knees will be affected or up to the hips, back, and on up through your body.
Taking a closer look at the feet to find clues about your body’s preferred movement patterns is an awesome starting point for those with pelvic floor issues, core, low back pain, SI (Sacroiliac) joint, pain with sex, erectile dysfunction, etc.
I attribute my lack of ankle mobility to a hip injury. I stopped using all the muscles for so long and my body decided to forget them and use other strategies to get me around!
This domino effect can work in both directions. It could have been my lack of ankle flexion that lead me to get injured in the first place, who knows? At that time in my life, I was not aware of my body like I am now as a trained Pilates instructor.
In this video, you will see how to assess your ankle mobility.
Props I used:
Wall space
ruler 4-6 inches
Male shoe
3” block or ½ foam roller or you can try a book with towels rolled up on top
Assessment #1: Place a ruler on the ground in front of a wall.
Standing, place your right toe at 6” see if you can bring your knee to the wall keeping the knee in alignment and your heel down. Your knee should get close.
Try the left foot.
Try 4” if you can’t get the knee close with the 6” distance
Be kind to yourself it tends to be a tight area that you want to be gentle with.
Assessment #2: Standing near a wall in case you need help to balance you will step your right foot forward. Place your left toes in line with your right heel so your stance is staggered.
Bend both knees, the back left leg is the one you are assessing.
You want the knee in line with the right ankle bone, the medial malleolus the bony projection on the inside.
It’s helpful to stand looking in a mirror or have a friend help you see where your knee is tracking.
This is one I do while I’m pumping gas or standing in a line, etc.
Try the other side.
Assessment #3: Kneeling using a male shoe (my hubby’s measured 4 1/2 inches) up against a wall.
Square off your hips, ground your heel down and keep it there as you drive your knee into the wall. Watch that your knee doesn’t go out or in, keep the alignment.
This one is harder for those with knee issues, I prefer the standing version.
Try the other side.
Assessment #4: Using a ½ foam roller or 3” block or book with a towel rolled up on top to get to 3”. My yoga block is about 3 ½ inches.
Stand near a wall for balance.
Place your left foot on the center of your surface and monitor what your pelvis does.
Your goal for adequate ankle dorsiflexion is you should be able to maintain the foot on the top and step the other foot forward comfortably without all the movement in the pelvis.
To recap, the importance of sufficient ankle mobility can help you avoid compensation patterns in your body which will help to avoid injuries and issues in the long run.
Assessment options to try:
Standing at the wall to see if knee can touch
Standing staggered legs with both knees bending – probably harder to see for yourself but great exercise to practice while brushing teeth, making coffee, pumping gas, etc.
Kneeling knee to wall, I did feel more hip activation in this version and it was harder!
Walking over block
If you want to take a closer look at your feet to assess more in-depth and learn exercises to help with bunions, high arches or flat feet contact me at michiko@michikopilates.com.
Working on my ankle mobility while I’m out for a walk!
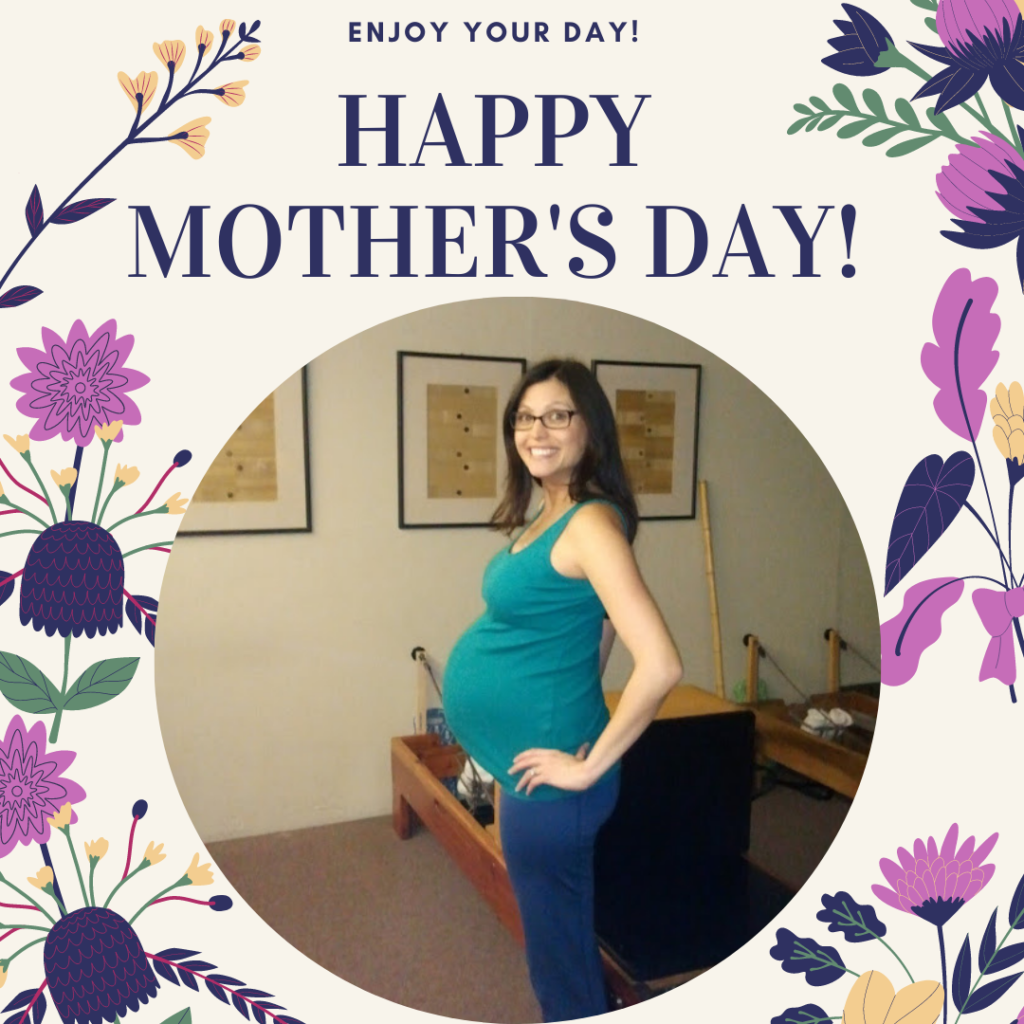
This picture is me, post-Pilates session pregnant with my boy who is now 7 years old! Time flies but one constant that remains for me is I’m still doing Pilates!
Throughout both of my pregnancies I continued my Pilates practice. Yes, it was modified for my growing belly, but I was getting my movement in and feeling the benefits!
As a Pilates student at the time, I don’t even think I was aware of all the benefits my Pilates practice brought me. So many changes happen to your body during pregnancy.
I remember being in class post 1st pregnancy and my instructor at the time noticed how my body was changing and asked if we were expecting again! I was a little mortified because I was just trying to figure out baby #1 and as it turned out I was pregnant with baby #2! My instructor was the first to guess it even before I knew it! LOL!
So this quick gentle flow goes out to all the mamas and really anyone looking to get some feel-good movement in for the day! Let’s call it a self-care Sunday movement session.
Props I use:
Towel
Box or chair
A wall
Breathing – rib cage
Toe Taps – single leg or try leg slides
Telescope Arms
Quadruped Shoulder Circles & leg slides
Seated foot towel exercises
Wall hand waves
Wall push up
Heel Raises on box/yoga block/stairs etc. near a wall
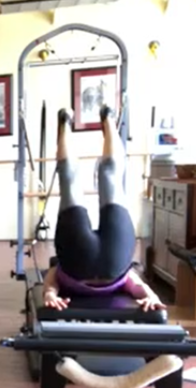
I’m practicing Romana’s classical Reformer order this month. I loved having a whole month of the classical Mat order, and I wanted to keep it going. As I’m teaching and practicing the work, my client asks about the difference between the Short Spine Massage and the Long Spine Massage. They are similar in the benefits of getting mobility of the spine.
The Short Spine Massage and Long Spine Massage are the same concepts. Finding the open chest and scapular stability in the upper body. They both are meant to strengthen abdominals, hamstrings, glutes and increase the flexibility of the spine and hamstrings while improving spinal alignment & balancing the spinal musculature.
Both exercises are inversions where we have our feet in the straps. The straps are a great way to support the body to come into the position.
They are both advanced movements where you’d want to have hamstring flexibility, be good with spinal flexion, and have no neck issues.
I now modify for low bone density and do the leg choreography leaving the inversion out. I’m going to try it with my hips elevated on a yoga block to get that same inversion feeling but in a safe way similar to the hips up on a foam roller for the Mat Bicycle and Scissors. The footbar up can be helpful to get your feet in straps, just make sure the headrest is down.
Here are some differences between the two:
Short Spine Massage
Long Spine Massage
Regular straps
Long Straps (short loop on the shoulder rest)
Springs: RY-RR (I was taught that lighter uses more core) Go heavier if you are larger or stiff in your body.
Springs: RB-3R
More flexibility through the upper back
More flexibility through the lower back
Leg Choreography: Combo of lift/lower & frogs from feet in straps work
Leg Choreography: Like rollover in Mat work, where at the top of the inversion you open the legs shoulder-width and roll down. You’d then reverse it.
Carriage stays moving as you go up.
Beginner: Let the carriage bring you up For more advanced, the carriage stays still as you roll up and down, either keep the carriage in or with the carriage held out (harder). It’s keeping it still wherever you start at rolling up & rolling down. Add on the hinge at the hips once at the top, bring the legs back towards the risers keeping the pelvis still then take the legs towards the footbar, then release down. Progress to high frog and there’s an airplane version too!
The straps and springs vary depending on what Reformer you are working on.
These are to be avoided or limited with pregnancy, low back injuries, neck injuries, high blood pressure, eye problems, overweight individuals, and those with osteoporosis.
I don’t typically teach these since the majority of my clients have some combination of the conditions above, including me with low bone density!
Pre osteopenia diagnosis at my old house in Round Rock, TX
As I watch myself doing this exercise I see how much my body isn’t wanting to articulate fully and the roll-down part looks a bit like a whole chunk of my back coming down at the end.
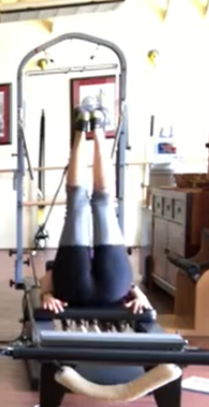
Preparing to go up into Long Spine Massage.
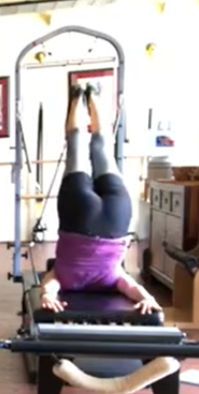
Made it up!
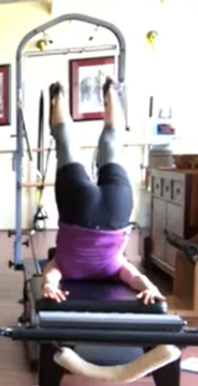
Opening the legs.
Coming back down.
These photos are of me performing Long Spine Massage during my training days.
Back to the “Classical Reformer Order” I’ve listed the exercises and have “Reformer on the Mat” videos in the works! Check out the standing warm-up video below.
Breathing w/arm lifts (inhale lift the arms, exhale lower) 3x
Knee bends or Plies (focus on leg alignment, posture & abdominal control) 10x
This list below is modified for low bone density. I leave out the rounded forward flexion and inversion exercises or sub them out with the low bone density safe variations.
Breathing supine: I like to add a pelvic clock here
Bridging 3x
Footwork 10x full sequence: I’ll be using a resistance band to mimic footwork on the Reformer
The 100: Head down with the option to use a resistance band or dowel instead of arm straps
Coordination: head down 6x
Short Spine Massage 6x: No inversion, leg lowers & frogs in the resistance band
Hug a tree 10x: I’ll use a resistance band or weights
Stomach Massage: Chest up, may use a ball, roller, or just slide the feet out and in.
Short Box Abs – 3-4x: Hinge back vs round back; gentle oblique version and possible climb a tree hold version.
Long stretch 4x: Plank adding in flex and point
Up stretch
Down stretch: Using a roller for this one is so much fun!
Elephant 6x: Walking Elephant on the mat
Semi-circle 6x each direction: May use a fitness ball or play with bridging variations
Long spine massage 3x each direction: No inversion, sub leg circles with a band
Knee Stretch: Flatback and Jackrabbit 4-8x
Running in place 25x: We can come up to run it out on this one!
Pelvic Lift 10x: fitness ball and bridging variations
Standing 6x each side: Resistance band work.
Rowing Front 1 – Flatback 4x: Resistance band or lightweights
Mermaid 3x
Finish: Sit on the side of the Reformer, hinge forward to stretch the back. HInge the spine back up & rise to stand.
I’ll be teaching this sequence Reformer revised to the Mat, next Saturday 4/24 at 3:00 PM CST in my monthly virtual community class! Link to join.
I had so much fun posting March MATness last month. Here are the last 5 exercise tutorials to finish off March MATness 2021!
March 27th: The Boomerang –Strengthen your core & hip flexors while increasing the flexibility of your hamstrings & shoulders. Improve balance too!
March 28th: The Seal & Crab – Improve balance and get a stretch
March 29th: The Rocking – Strengthen the back body while stretching your front body
March 30th: The Control Balance – Develop core strength & control while stretching your hamstrings
March 31st: The Push Up – Strengthen your entire body!
March 27 – The Boomerang: 4 reps
SETUP: I start seated with one leg crossed over the other. Get up on sit bones, get the pelvis aligned and everything stacked.
MOVEMENT: Instead of the rolling down part of this exercise, I hinge back, come down onto my elbows then I plank down taking my arms out to the sides as I go for support to keep lengthened in my spine vs rounding down.
Instead of the roll-over part of the exercise, I do the prep. Widening through the collarbones and allowing the shoulder blades to glide down the legs come up to the ceiling. The pelvis rolls away from your head and back towards you to get the hoovering feeling and abdominals active.
Instead of crossing the legs while in the rollover, I play with crossing my legs while my pelvis is down. Scissor, scissor, open.
I roll to the side to come up and find my teaser position. I choose the elbow down variation.
I lower my legs and find the chest opening with my palms together clasped behind my back. I open up and stay lifted vs rounding forward.
RECAP:
Sitting tall with one leg crossed over
Hinge back to plank down
Rollover prep & scissors
Teaser
Chest opening staying lifted through the spine
March 28 – The Seal & Crab: 4-8 reps
The Seal & Crab are both rolling exercises. For low bone density we can play with the balance for The Seal or do a figure 4 stretch and we can do a modified version of the Crab and play with legs crossed.
SETUP SEAL: seated with knees bent, hands under thighs.
MOVEMENT: hinge back, find the curl of just the tail, and unweight your feet to come to a balance. Hands move onto the ankles while you keep lengthened through the spine and open in the chest. Feet come together to clap 3 times.
STRETCH: Come down onto your back for a figure 4 stretch if the balance is too much.
CRAB: Try to cross both legs after the figure 4 stretch if it’s comfortable for the knees.
Switch the legs to cross the other way.
The other idea to modify is to sit and stand from the cross-legged position without rounding in the spine. (Only if your knees are ok with this)!
March 29 – The Rocking: 4-6 reps
I’m showing the one-arm rocking modification for low bone density that I learned from Sherri Betz. It’ll be a good quad stretch.
SETUP: I come down onto my belly placing my forehead down, try to keep knees in toward midline while trying to keep my hip down.
MOVEMENT: Reach the arm back long as you bend the knee to find your foot. If you can’t reach you can use a resistance band.
I think about my upper arm externally rotated and open.
See if you can lift up the thigh a bit.
PROGRESSION: Come up onto the forearm to get some upper back extension and opening through the front of the chest. I’m still anchoring down into my pelvis.
Try to lift using breath and feel the low belly helping to take the ribs off and leg up with the arm straight.
March 30 – The Control Balance
I start with the rollover prep that is the safe low bone density option for inversions.
I scissor one leg towards me and find a place that is comfortable for me to pull my leg in as I use a sniffing inhale breath to pull in twice and an exhale to switch the legs. It’s the single straight leg stretch.
It’s a combo move that you can play around with alternating the 2 exercises to make it your low bone density control balance!
March 31 – The Push Up
Standing, breathing in as the arms rise up, hip hinge down to grab weighs if you like. I play around with an overhead press and hip hinge back down to set the weights down.
I walk out into a plank and show push-up bars for those who may have wrist issues. I also show using weights.
Option 1 is to hold the plank
Option 2 knees down to perform push-ups
Option 3 pushups from plank
Option 4 forearm plank with shoulder blade pushups
Coming back up, pike or down dog to then walk the hands back in
Complete list of March MATness low bone density safe Pilates exercises to use as a reference for your personal practice.
PROPS: These are all the props I used throughout the tutorials so you are able to gather them before your practice.
Bath towel folded or small pillow
Rolled up small hand towel
Yardstick or dowel for tying on your back – or you can stick it in your shirt
Resistance bands
Foam Roller or small ball (can use rolled-up bath towel)
A yoga block or thick books
Push up bars
Ankle weights
Light hand weights
The Hundred – head down 10 reps
option to add 2lb ball weights & 5lb ankle weights
The Roll-Up – hinge back keeping neutral 3-6 reps
option to sit on a towel, yardstick tied to back & resistance band for rows
The Roll Over – rollover prep
legs together to go up & open legs at the top to come down. Reverse it after 3.
The One Leg Circle – Small & large 4-8 each way
option to use a resistance band
Rolling Back 6-10 reps
balance modification keeping a neutral pelvis (can use yardstick) and allowing a slight curl of the tailbone.
bridge curling from the tail to get the “rolling” motion.
The One Leg Stretch – head down 8-12 sets
towel under my head, rolled up sticky under lumbar, 5lb ankle weights
The Double Leg Stretch – head down 3-6 reps
option to use a low back support
The Spine Stretch – hinge forward 4-8 reps
yardstick with resistance bands up on a towel
Rocker with Open Legs – 4-8 reps
balance modification w/yardstick
The Corkscrew
Low back support
The Saw – 4-6 sets
Lean back version
The Swan-Dive 3-6 reps
Towel under hips
The One Leg Kick 6-10 sets
The Double Kick 3-6 sets
The Neck Pull 3-6 reps – hinge back w/yardstick
The Scissors & Bicycle 4-6 reps on the roller or rolled-up towel
The Shoulder Bridge – 3-4 sets
The Spine Twist 4-8 sets knees bent option
The Jack Knife 3-4 reps – resistance band under hips
The Side Kick 6-10 reps
The Teaser modified 3-6 reps
Elbow start position
Hands start position
The Hip Twist 3-6 reps
Swimming 15-25 sets
The Leg Pull Front 4-6 sets
The leg Pull Back 4-6 sets
The Side Kick Kneeling 6-8 sets
The Side Bend 4-6 sets
The Boomerang 4 reps
The Seal & Crab 4-8 reps
The Rocking 4-6 reps
The Control Balance – rollover prep w/single straight leg
View the entire playlist below and of course, skip through if you know the exercise because it’s over an hour and a half of content!
I filmed a zoom class that goes through the entire sequence for a better flow. Let me know if you’d be interested in that option vs watching through the tutorials.
April is all about the growing season & when trees and flowers begin to “open”.
My home Pilates studio has also grown to include a wall tower which can offer up 95% of the exercises you can do on a full Cadillac. This new addition will surely grow my home practice and allow so much more variety in exercises. I’m playing around using the Reformer and Tower together, also known as RTC (Reformer Tower Combo) which is really a cool double spring effect where you just feel everything working! Springs from the Reformer carriage as well as springs from the Tower are quite challenging and fun!
Here’s a tour if you didn’t catch it on my Instagram page @michiko.myers.
Weather is nice out and I’ve got a poll below for locals input! Thanks, Michiko
This week’s recap of Pilates movements from Joseph H. Pilates RETURN TO LIFE book in the original order includes:
March 20th – The Side Kick – Strengthen your hips, lateral torso and develop stability in a side-lying position.
March 21st – The Teaser – Strengthen your core, hip flexors, inner thighs, quads and develop coordination & balance while challenging your control of torso & legs. The elbows down and hands down variations improve scapular stability.
March 22nd – The Hip Twist – Same benefits as above with added rotation.
March 23rd – Swimming – *****Superstar for low bone density*****Strengthen your back & hip extensors.
March 24th – The Leg Pull Front & Back – Your entire body is working in this one!
March 25th – The Side Kick Kneeling – Strengthen your hips & shoulders while improving balance.
March 26th – The Side Bend – Strengthen your side body, shoulder girdle and improve your core control, balance & coordination.
Props I use:
Folded-up bath towel to pad my pelvis and ribs
Yoga block
Optional props:
Foam roller
Push-up handles or hexagonal metal weights
All of the exercises are taught with low bone density in mind and are modified for safety. It’s really important to include back strengthening exercises if you have osteopenia or osteoporosis and The Swimming is a great exercise for those with low bone density. They are also great for those looking to improve back-body strength.
Explore below and let me know which one is your favorite down in the comments!
Remember to go back to the previous posts to see the exercise tutorials from the beginning which is key to building up or warming up the body for the following exercises in the Mat Pilates sequence.
March 20th – The Side Kick: 6-10 reps
I like to use the back of my mat as a guide to line up my body. Shoulders are stacked, hips are stacked and feet are stacked. I’ve got a tendency to take my head forward, but I really want the neck long and throat back to keep the alignment. I try to keep the pelvis still and just the working leg moving.
UPPER BODY SETUPS:
laying your arm down & placing your head on top. You can use a pillow especially for those who have neck, shoulder, wrist or elbow issues.
Prop head up on hand with the elbow on the mat, the other hand goes on the mat in front for balance
Both hands behind head, just balancing on the elbow
On the elbow in lateral flexion
Greater bone-building option up on elbow in a side plank
LOWER BODY SETUPS:
The bottom leg can bend into 90 degrees to create a kickstand and more balance support
Bottom leg towards the front edge of the mat with toes tucked under to create more support
Some people have pain or discomfort lying on their side because of the bony greater trochanter, an option would be to pad around it making a donut to see if it can relieve the discomfort or you can just take it up into a hoover and challenge yourself!
MOVEMENT: Reach your leg, keeping it the same height as you kick on an inhale (sniffing breath), and exhale to take the leg back.
Repeat on the other side, can stretch the hip as a transition.
This exercise strengthens all around the hips, side body and helps to develop stability in a side-lying position. The hips are important to strengthen for those with low bone density as it’s a common fracture site.
March 21st – The Teaser: 3-6 reps
We just finished up The Side Kick, I’ll show 3 different variations of a low bone density safe Teaser.
SETUP 1 – Down on elbows
The spine position is important, think of lifting up vs dumping down and find a neutral pelvis position. For me, I’ve got to take my pubic bone forward a bit.
Float one leg up to a tabletop position and hold.
Float the other leg up to a tabletop position to meet the first leg.
Try to straighten out one leg at a time.
Add on lowering the leg after you straighten.
Try both legs extended, lower, and lift.
Try to get one hand up and the other. I had to bend my knees to get that to happen in my body.
SETUP 2- Up on hands to support
Try all the progressions from above.
SETUP 3-Using the hands behind the thighs, hinge back slightly and curl just the tail keeping neutral in the pelvis still.
Play around with all the progressions to see where you can get while lifting through the spine and staying in a neutral pelvis position.
If you have low back/SI joint issues or hip flexor strains: Use caution, listen to your body, and if anything is aggravated avoid it to stay safe.
March 22nd – The Hip Twist: 3-6 reps
After The Teaser, is The Hip Twist. I call them hip circles.
SETUP 1: The same beginning version of The Teaser down on the elbows is where I begin. I play around with my pelvis to find my neutral, curl the tail just a bit to feel that connection.
MOVEMENT: Take one leg into a tabletop position and the other leg up to meet the first. Take both legs to the side on an inhale and back to center on an exhale. To progress, try to extend one leg up as you are to the side and see how that feels. Progressing more is to extend both legs to straight and take the legs side to side. You can then go into circles with the range that feels comfortable to you keeping the pelvis neutral.
SETUP 2: The next position I show is up on my hands. I’ve got to organize my shoulder blades, get my neck long and find my pelvis placement in this position.
Try the same progressions as above.
If you have low back/SI joint issues or hip flexor strains: Use caution, listen to your body, and if anything is aggravated avoid it to stay safe.
March 23rd – Swimming 15-25 sets
I use a folded-up bath towel to pad my pelvis and ribs.
I start with my forehead on my stacked hands and reach one leg out and alternate to the other leg. I progress to goal post arms and hoover up my head off the mat. Lift one arm and the opposite leg.
I then come up with a thoracic extension and show different arm placements, the overhead being the hardest.
If you have back issues, be sure you can tolerate back extension or avoid.
If you have shoulder injuries: lift the legs only.
March 24th – The Leg Pull Front & Back 4-6 sets
These two exercises are essentially a front plank and a back plank.
The Leg Pull Front:
SETUP 1: When you come out of Swimming you can take a rest pose and then come into all fours. From the all-fours position, you can take one leg to pulse it up twice.
SETUP 2: Step back into a full plank, kick one leg up as the standing foot flexes to move the body back and forth.
My apologies, I call it the control front which is the Reformer version, whoops! Then I call The Leg Pull Back the control back! LOL! I teach this same exercise on the Reformer every week and much less on the mat so my mind isn’t getting the 2 separate names.
The Leg Pull Back:
The back variation is great because you get a good chest opening. I show the feet down version in a back plank to start. The head position is important to keep it comfortable vs letting it hang back.
I show with the legs straight out, where you can use a foam roller under the ankles. I prefer my hand position to be out to the side vs fingers pointing to my bottom. It takes me some organizing of my shoulder girdle to feel set enough to hoover up into the plank.
If you have wrist issues, use push-up handles, hexagonal metal hand weights, or come down onto forearms or place forearms on a raised surface like a sitting box or yoga block.
If you have neck or shoulder issues, the back variation may need to be modified or avoided.
March 25th – The Side Kick Kneeling 6-8 sets
I use a yoga block that helps elevate your hand in case your hips are really tight. Option for a knee pad if pressure on the knees is uncomfortable.
If you have hip, neck, shoulder or wrist issues, you may need to modify or avoid.
SETUP: Lengthen up through the spine and take the arms out to the side Tip-over to one side to bring the hand onto the mat. Or place the yoga block where your hand will land. Try to stack your hip right over your knee to feel a stretch,
MOVEMENT: You can play with going side to side first. Once you are in the position, the top leg kicks forward and back. I have to focus a lot on my hip getting open enough to be right above my knee, my head being back in line with my spine and my ribs staying connected.
I’m so thankful to see my progress in this exercise. When I first started I could barely find the start position I was so locked up and tight in my hips.
6-8 sets
March 26th – The Side Bend 4-6 sets
I start with a side lift, a variation of side bend with the elbow down. You can use a pillow or towel if your elbow is sensitive.
SETUP 1: Both legs bent – I stack everything up, hips stacked, shoulders stacked, and think about my spine alignment with my head in line. You can have your top hand down for extra support and if stacking the feet feels uncomfortable you can stagger them.
MOVEMENT: Hoover pelvis
SETUP 2: Bend bottom knee & take arm overhead – you want the underside of your ribs lifting up to support your shoulder joint. I like to have a little external rotation in the upper arm to help.
MOVEMENT: Lift up and take the top arm overhead to lengthen out.
SETUP 3: Staggered stance – both legs are straightened out and the feet are staggered to give a better base of support. Keep spinal alignment in mind, use breath to connect ribs in.
MOVEMENT: Lift both hips up & down, add on the top arm to the ceiling
SETUP 4: Stacked feet – try to add on leg lifts Find the axial elongation and notice if there is a difference between sides to see if there are any imbalances.
I’m thankful to have found an amazing neighbor @sheshopetx that has made my custom Pilates tank top! She’s put together several different Pilates-inspired designs to check out! https://www.michikopilates.com/2020/10/02/custom-pilates-shirts/
4-6 sets
We are in the home stretch with only 5 days left in March for the last 5 movements to complete March MATness.
Sneak peek of the last exercise tutorials:
March 27th: The Boomerang – It’s a combo move with movements learned earlier in the Mat sequencing
March 28th: The Seal & Crab – These are tricky to convert to safe low bone density exercises
March 29th: The Rocking – I show the modifications and it’ll be a fantastic stretch
March 30th: The Control Balance – Another combo move
March 31st: The Push Up – Wow, you’ll be glad you made it through!
I’m so excited to get all of these tutorials in a YouTube playlist to see it all together and so you can enjoy it!
This week’s recap of Pilates movements from Joseph H. Pilates RETURN TO LIFE book in the original order includes:
March 13th: The One Leg Kick – *****Superstar for low bone density***** Strengthen your back extensors, serratus anterior, hamstrings & glutes while stretching your quads and improving your scapular stability, axial elongation & abdominal support in extension
March 14th: The Double Kick – Same as above just swap out the serratus anterior/scapula stability work for a lovely chest & shoulder stretch
March 15th: The Neck Pull – Increase your abdominal strength
March 16th: The Scissors & Bicycle – Increase your core control while stretching your hamstrings & hip flexors
March 17th: The Shoulder Bridge – Strengthen your hamstrings, gluteals & erector spinae
March 18th: The Spine Twist – Increase your spinal rotation safely
March 19th: The Jack Knife – Learn how to stabilize your shoulders as you develop core strength & control.
Props I use:
Towel under pelvis & ribs (try a small pillow)
Yardstick tied around my waist with a resistance band (use a dowel or scarf to tie)
Foam roller for under the hips (use a small ball or rolled-up towel)
All of the exercises are taught with low bone density in mind and are modified for safety. It’s really important to include back strengthening exercises if you have osteopenia or osteoporosis and The One Leg Kick & The Double Kick are perfect for you! They are also great for those looking to improve those posture muscles.
Explore below and let me know which one is your favorite down in the comments!
Remember to go back to the previous posts to see the exercise tutorials from the beginning which is key to building up or warming up the body for the following exercises in the Mat Pilates sequence.
We are more than halfway done with March! Next week’s post will be exploring The Side Kick, The Teaser, The Hip Twist, Swimming, The Leg Pull Front & Back, and The Side Bend! It just gets more challenging! I love Pilates!
March 13 – The One Leg Kick: 6-10 sets
Coming out of The Swan where I show a preparatory exercise with the forehead on your stacked hands, this same setup is a good place to begin in The One Leg Kick. This version may decrease the discomfort for those who get really tight in the low back or are prone to neck & shoulder stress.
SETUP: I like to lengthen my legs out and find my pubic bone and hips. I use my breath to hollow my belly up off of the mat.
If you have knee issues, stretching the quads first is best.
If you have low back issues, try pressing your pubic bone into the mat to help take pressure off the back or stay with the head down version.
MOVEMENT: Take one leg, reach it and lengthen it out so far it floats up.
Kick your heel into your butt twice to fire up the hamstrings and then lengthen the leg out again to set it down.
Repeat on the other leg.
FULL EXERCISE: The sphinx position upon the elbows really works to improve low bone density where we need it in the upper thoracic area, back extensors, and hoovering the pelvis up really gets into how to keep the alignment & elongation in the spine and use the abdominals to support in the position.
I think about all the shoulder blade muscles coming down my back as my heart’s center is going forward. I like to pull the hands apart on the mat energetically to feel more width in the upper back and get an oppositional feeling. It’s very important to keep the low belly lifting here as you lift your pelvis off the mat just slightly. Low belly and ribs connecting and feeling the shaky feeling.
I’m thankful for this position as an alternative to sitting when on the computer or reading with my kids. It’s a great alternative to open the hips and strengthen those posture muscles!
March 14 – The Double Kick: 3-6 sets
TRANSITION: We just did our single leg kick, we’ll bring the head down and take the hands behind the back. If getting the hands on the small of your back isn’t happening with tight shoulders, just reach the hands down by your side towards your feet.
If you have low back or knee issues, see the previous exercise for tips.
MOVEMENT: Hoover up the head, lengthen the feet out away, and kick, as you lengthen the legs back out you come up in the torso. You’re in the swan thoracic extension position just with your hands behind you stretching your shoulders and chest open. You can turn your cheek to one side, then the other as you kick.
For low bone density, watch that the range of motion doesn’t get too extreme in the upper back extension. Think about a long rocking horse curve in the spine.
Benefits are similar to The One Leg Kick above. Strengthens the back body, stretches the shoulders, chest, and quads.
March 15 – The Neck Pull: 3-6 reps
TRANSITION: Coming out of The Double Kick, I’m using my yardstick and resistance band again. The Neck Pull is like in the roll-up (hinge back for low bone density) exercise but harder with your hands behind your head.
If you have neck or shoulder issues, try the Roll-up (hinge back) where your hands are not up behind your head.
SETUP: I want to feel the yardstick on my head, in between the shoulder blades and pelvis throughout the exercise.
MOVEMENT: I place my hands on the back of my head pressing into my head and my head pressing into my hands to find that oppositional feeling to help lengthen me up. I energize my heels away, connect into my inner thighs and hinge back. I’m still thinking about my shoulder blades gliding down my back. I play with hinging forward too. I only go to my challenge point where I feel shaky but I can keep control of the movement.
This will increase abdominal strength and work on posture.
March 16 – The Scissors & Bicycle: 4-6 reps
PROP: I’m using my foam roller for hip support. You could try a squishy ball or a rolled-up towel.
If you have low back issues or the prop doesn’t feel good for any reason try keeping the hips down moving the legs keeping the pelvis stable.
SETUP: Come down to your side and onto your back. Place the roller behind your thighs and hinge bridge up to get your hips on top. Make sure your pelvis feels supported here and keep off the lumbar vertebra. Collarbones are open wide, hand on the ends of the roller. I use my breath on an exhale to soften the ribs down.
MOVEMENT: One leg up to tabletop, then the other leg meets the first in a tabletop position. Extend both legs up to the ceiling, you can have a slight bend in the knees. Scissor one leg towards your head and the other one away keeping the pelvis still. Find the stretch of both the back of the leg and the opposite front of the hip.
For Bicycle, you drag your heel energetically towards your bottom and reach back into the scissor, then drag the other heel bicycling your legs alternating. You can reverse the direction.
To dismount, lift the hips into a bridge and roll the roller out from under you, then let the spine reconnect with the floor and settle.
It’s great to work on core control and stretch the hamstrings & hip flexors.
I’m thankful for my foam roller knowledge to open up and release tight areas especially since it’s been forever since I’ve had a proper massage.
March 17 – The Shoulder Bridge: 3-4 sets
For low bone density, we take the hips into a low bridge vs the high bridge with the hands supporting underneath.
SETUP: Come into a bridge, feet sit bone distance apart, arms are planted into the mat, shoulder blades gliding down and softening the ribs.
MOVEMENT: I hinge bridge up to bring my spine into a long line from shoulder joints to the pelvis to knees reaching away. Collarbones fall open, stand down into the left foot to bring the right leg into a tabletop while keeping the hips level. Extend the leg up to the ceiling, flex your foot to kick down 3 times, and point up. Repeat on the other leg.
This works the whole back of the body, not just the hamstrings that I mention. The glutes help to keep the pelvis up & erector spinae are helping as well. Notice which side is harder, mine is the left.
I’m thankful for this exercise to help me gain more strength in my left side glute and hamstring that tend to be out to lunch!
March 18 – The Spine Twist: 4-8 sets
SETUP: Sitting up with knees bent and hands under thighs. Keep tall and lengthened up.
If you have low back discomfort, try sitting up on a rolled-up towel or even up on a chair to get your pelvis in a better position.
MOVEMENT: Gently rotate to one side but not the full range of motion. Come back to center, lengthening up tall, inhaling. Exhaling and spiraling, think about your belly button turning. Add on the hand across the opposite thigh to assist in the spiraling stretch upwards. Add on the arm going back behind with the palm down. Try the other side. Remember to not force the stretch and think 75% vs 100% range of motion.
I’m thankful for being able to find safe ways to get my rotation in!
March 19 – The Jack Knife: 3-4 reps
Come down onto your side and roll onto your back. Jackknife is similar to the roll-over as it’s another inversion. The low bone density safe variation is to perform it the same as Rollover prep.
Modification, try with legs bent to start or use the resistance band around the arches of your feet to get a good stretch in the backs of the legs.
Arms are down by your sides, legs come up to the tabletop position, legs extend to the ceiling, Small roll of the pelvis, curling the tail up a bit. I add on a resistance band to hold with my hands to assist in getting my upper arm bones externally rotated.
I’m thankful for the resistance band tip from my teacher trainer!
If you missed last weeks post, keep scrolling and you’ll find the previous Mat Pilates movements in order from Joseph H. Pilates RETURN TO LIFE book.
March 6th: The One Leg Stretch – Strengthen your abdominals, develop pelvic stability & core control
March 7th: The Double Leg Stretch – Same benefits as above, just harder
March 8th: The Spine Stretch – Learn how to sit up tall with support and find your axial elongation
March 9th: Rocker with Open Legs – Improves scapular & pelvic stability, core control, coordination & balance
March 10th: The Corkscrew – Increase your core support, control, and scapular stability
March 11th: The Saw – Increase the mobility of your shoulder girdle and find a safe and gentle rotation
March 12th: The Swan-Dive – ***This one is a superstar for low bone density*** You will improve your back extension & scapular stability by strengthening your back extensors along with your hamstrings & gluteals
I perform the head down variation which is safe for low bone density. I’ve got a small towel under my head, you could use a pillow or stack up more to feel comfortable.
I add 5lb ankle weights to increase the load, but I’m not taking my legs down as far because I want to keep control in my pelvis.
I’m thankful for how this past year my mat has helped me reconnect with amazing friends through zoom and meet new friends.
March 7 – The Double Leg Stretch: 3-6 reps
The low bone safe version is head down. I use low back support to help give me feedback in this challenging exercise. I start with my hands behind my head with my elbows up as I take my legs straight up to the ceiling. I’m working on getting my legs to connect into my core before I move on. I then add on the longer lever of my arms extended out and play with lowering the legs a bit.
I’m thankful for my amazing friend/client Brooke for introducing me to Pilates and giving me little cues that helped her from her past teachers! Love the top hat visual!
March 8 – The Spine Stretch: 4-8 reps
I use my yardstick with resistance bands again for this exercise. I have tight hips which makes this one super challenging for me.
I love that I’m training my core to sit up with support and keep my posture in check with the yardstick.
March 9 – Rocker with Open Legs: 4-8 reps
I performed the balance portion of this exercise for low bone density and used the yardstick again!
I’m thankful for the reminders from my teacher trainer. The last Mat class in person before the pandemic hit I remember being a hot mess trying to do this with all the other instructors doing it so beautifully. I would get so frustrated that I couldn’t get this one down and she would gently remind me that I have things going on in my hip from my past that I have to take into consideration. Work in progress. Be gentle and be kind. : )
March 10 – The Corkscrew: 3-6 reps
I perform the modified corkscrew and show variations to progress. Think conservative 75% vs 100% with the legs going to the side for low bone density.
I’m thankful for my neighbor allowing me to upcycle his shirt and bring new energy to it. Bonus, it’s my favorite color baby blue!
March 11 – The Saw: 4-6 sets
This modification I learned from Sheri Betz. It feels awesome to get the upward spiraling feeling!
I’m thankful for all the exercises I can still do even with low bone density!
March 12 – The Swan-Dive: 3-6 reps
I perform the swan but leave out the dive for low bone density.
I’m thankful for Nicole at Synergy Pilates for helping me work out the kinks in my form on this one! In the correct alignment, the full swan really gets the front of my body fired up to support the position.
Every year, Pilates lovers around the world join in a monthlong celebration of Pilates: one day at a time, one movement at a time. Hosted by 360° Pilates
March 1 – The Hundred: 10 sets (inhale for 5, exhale for 5)
I’m performing a head down variation that’s safe for low bone density.
I’m working on building up my bones so I add 2lb ball weights & 5lb ankle weights to assist in my efforts!
I’m thankful for this breathing exercise, especially in a pandemic.
It’s a perfect way to work on deepening your breath to get oxygen to your body.
March 2 – The Roll Up: 3-6 reps
Low bone density safe version is hinge back keeping neutral.
I use a yardstick tied to my back with a resistance band to find and keep my alignment.
I add on sitting upon a rolled-up towel to help get my pelvis in a better place.
I use another resistance band around my feet to help me stay connected and to add in a row for upper back strength.
March 3 – The Roll Over: 3 each way
The rollover prep is all that is safe for low bone density.
You can add the leg choreography. On the way up legs together, at top open legs shoulder-width to come down. Reverse it after 3. Legs stay open on the way up and close on the way down.
I’m thankful my last full rollover was teaching my long-time friend & now a client who originally told me about Pilates back in 2005. Where would I be without Pilates in my life????
March 4 – The One Leg Circle: 4-8 circles each way
I show both the small and large circles. I start by using a resistance band and show a knee stir prep and another modification that I personally used for a long time.
I talk about how I limit my range of motion going away from my body so I can protect my hip, which is one of the primary fracture sites when dealing with low bone density. I didn’t mention it but, a smaller range of motion and awareness would be good for those with hip replacements too.
I’m thankful for how Pilates has allowed me to work through my old hip injury and I’m so surprised at how far I’ve come on that left side and getting more freedom of movement.
March 5 – Rolling Back: 6-10 reps
All the rolling spinal exercises are a no-go for low bone density so I’m showing a balance modification keeping a neutral spine and allowing a slight curl of the tailbone.
I also show a bridge curling from the tail to get the “rolling” motion.
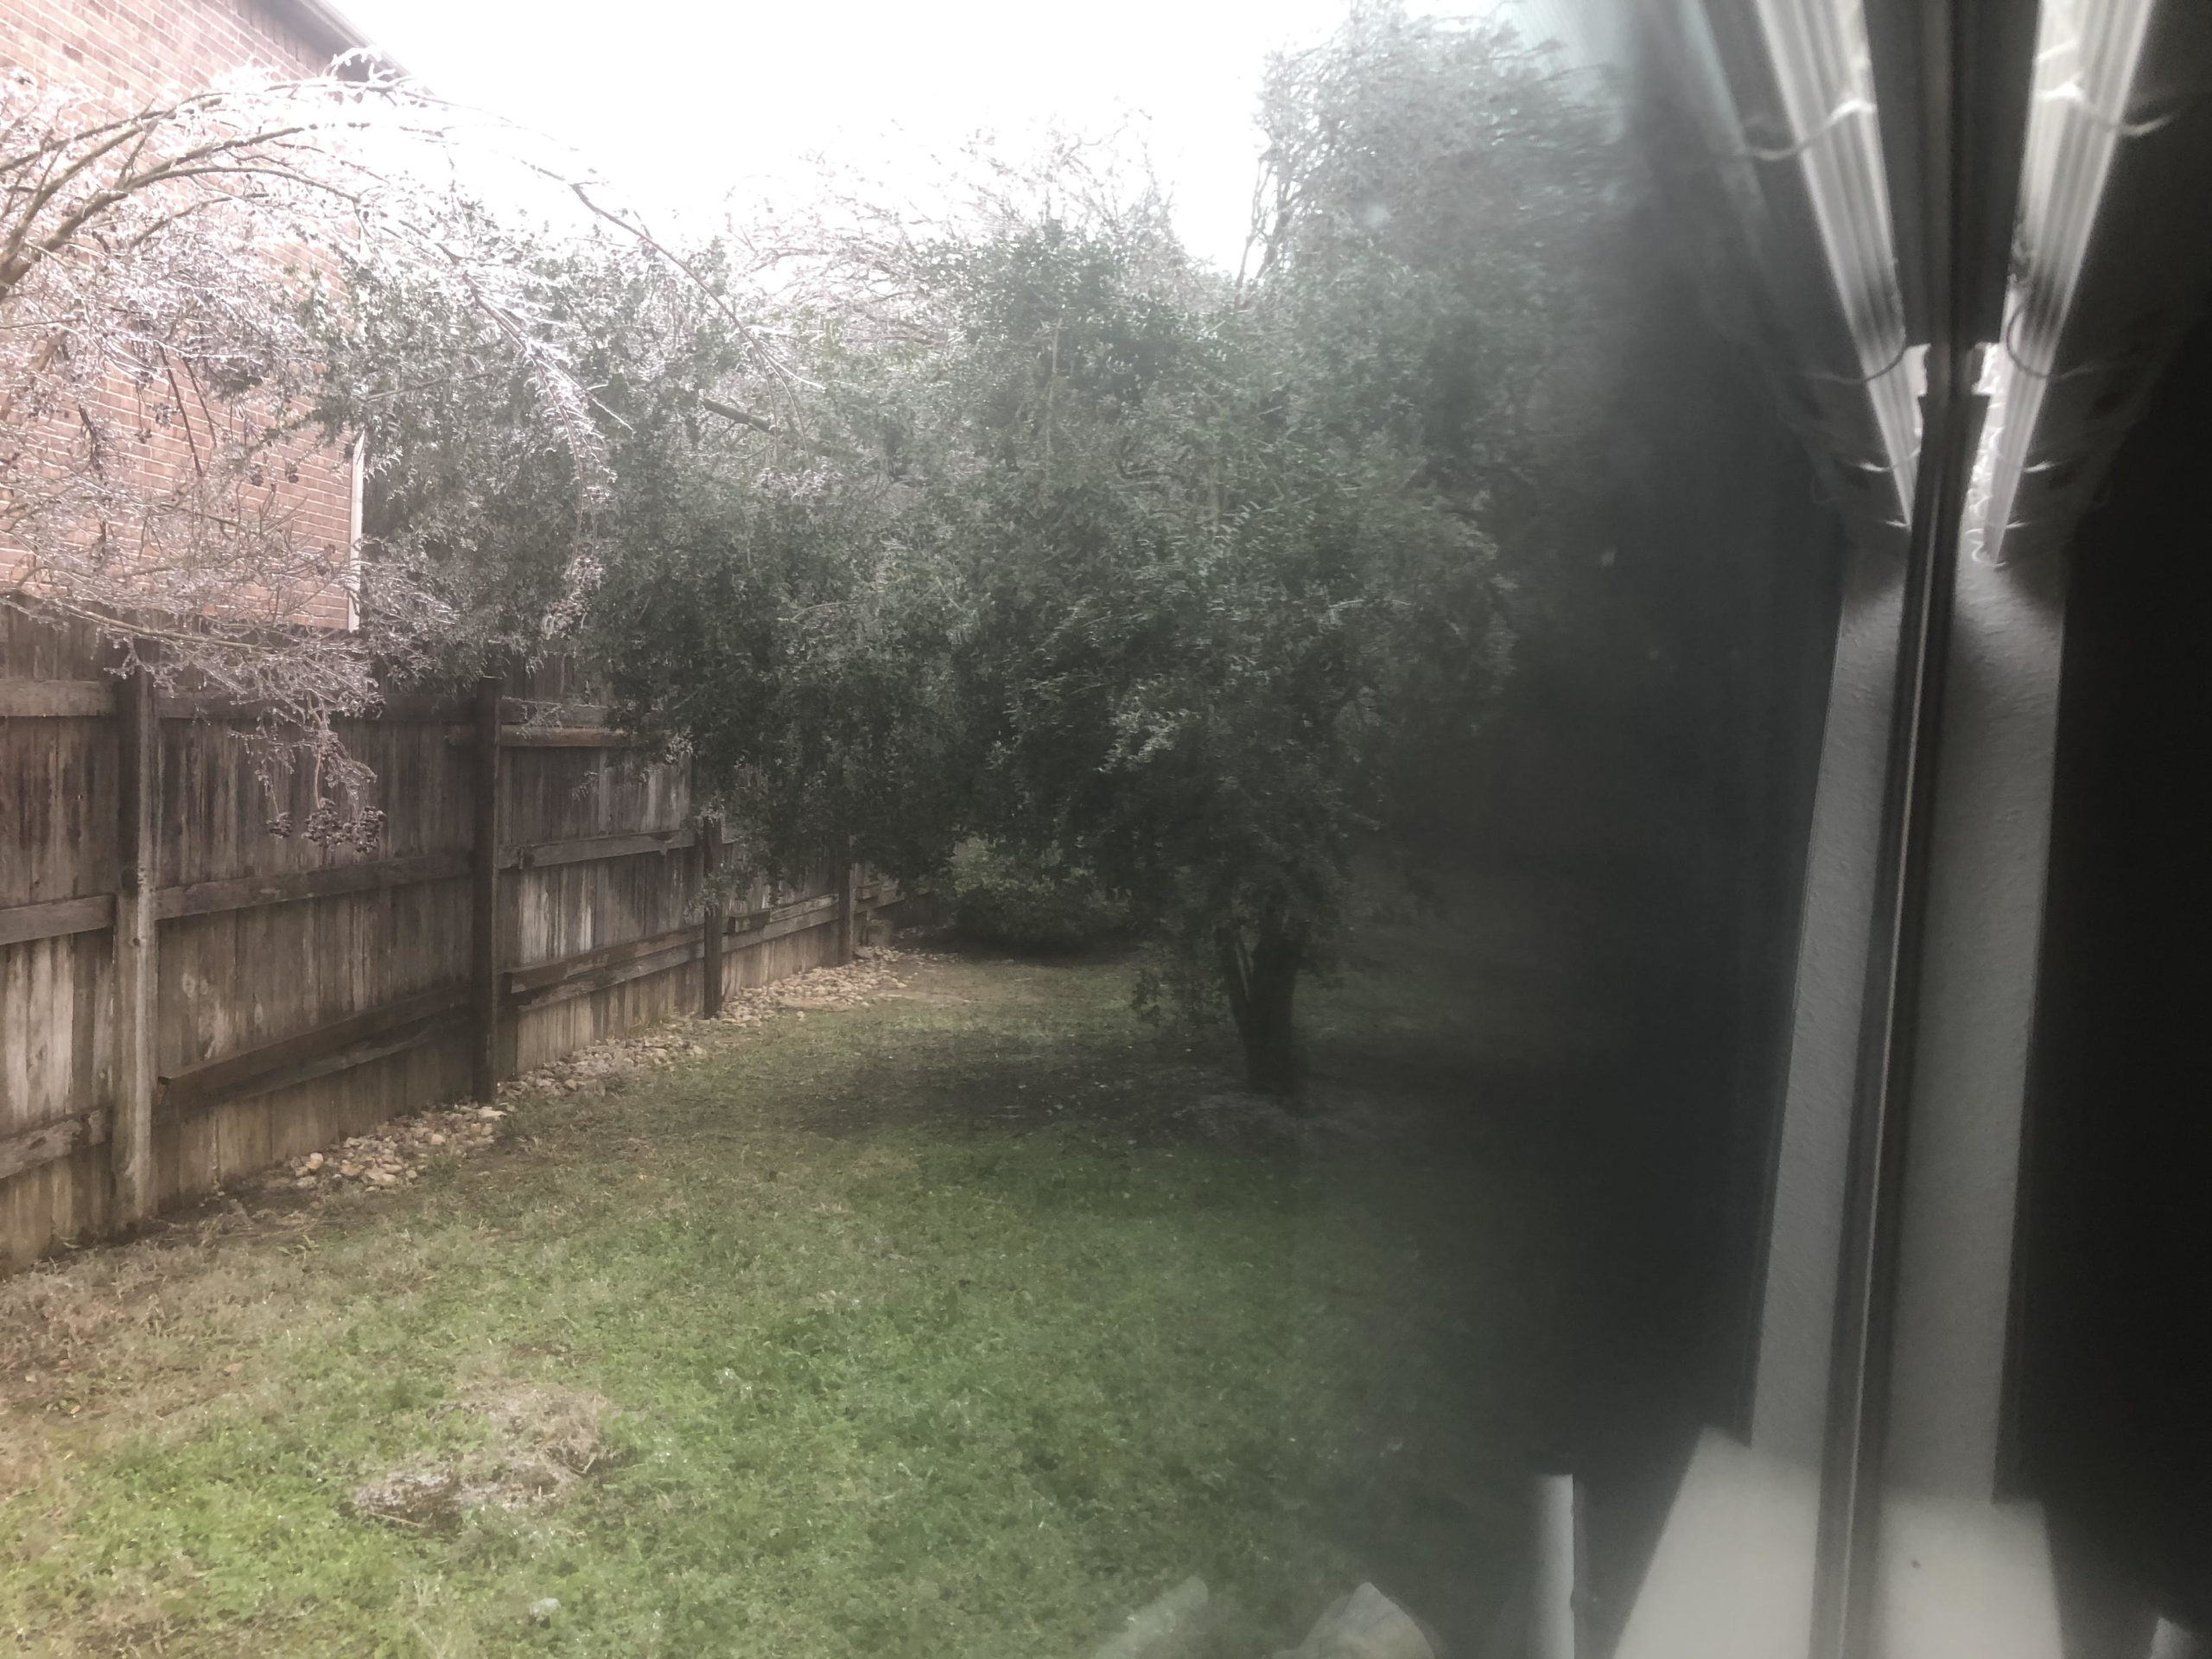
This month has gone by so fast! We all went into survival mode here in Texas with the historic arctic blast.
You’ll find a yummy recipe (made early on when we still had internet, power, etc.) below as well as photos of the stages of storms we experienced and finally new equipment in my home studio!
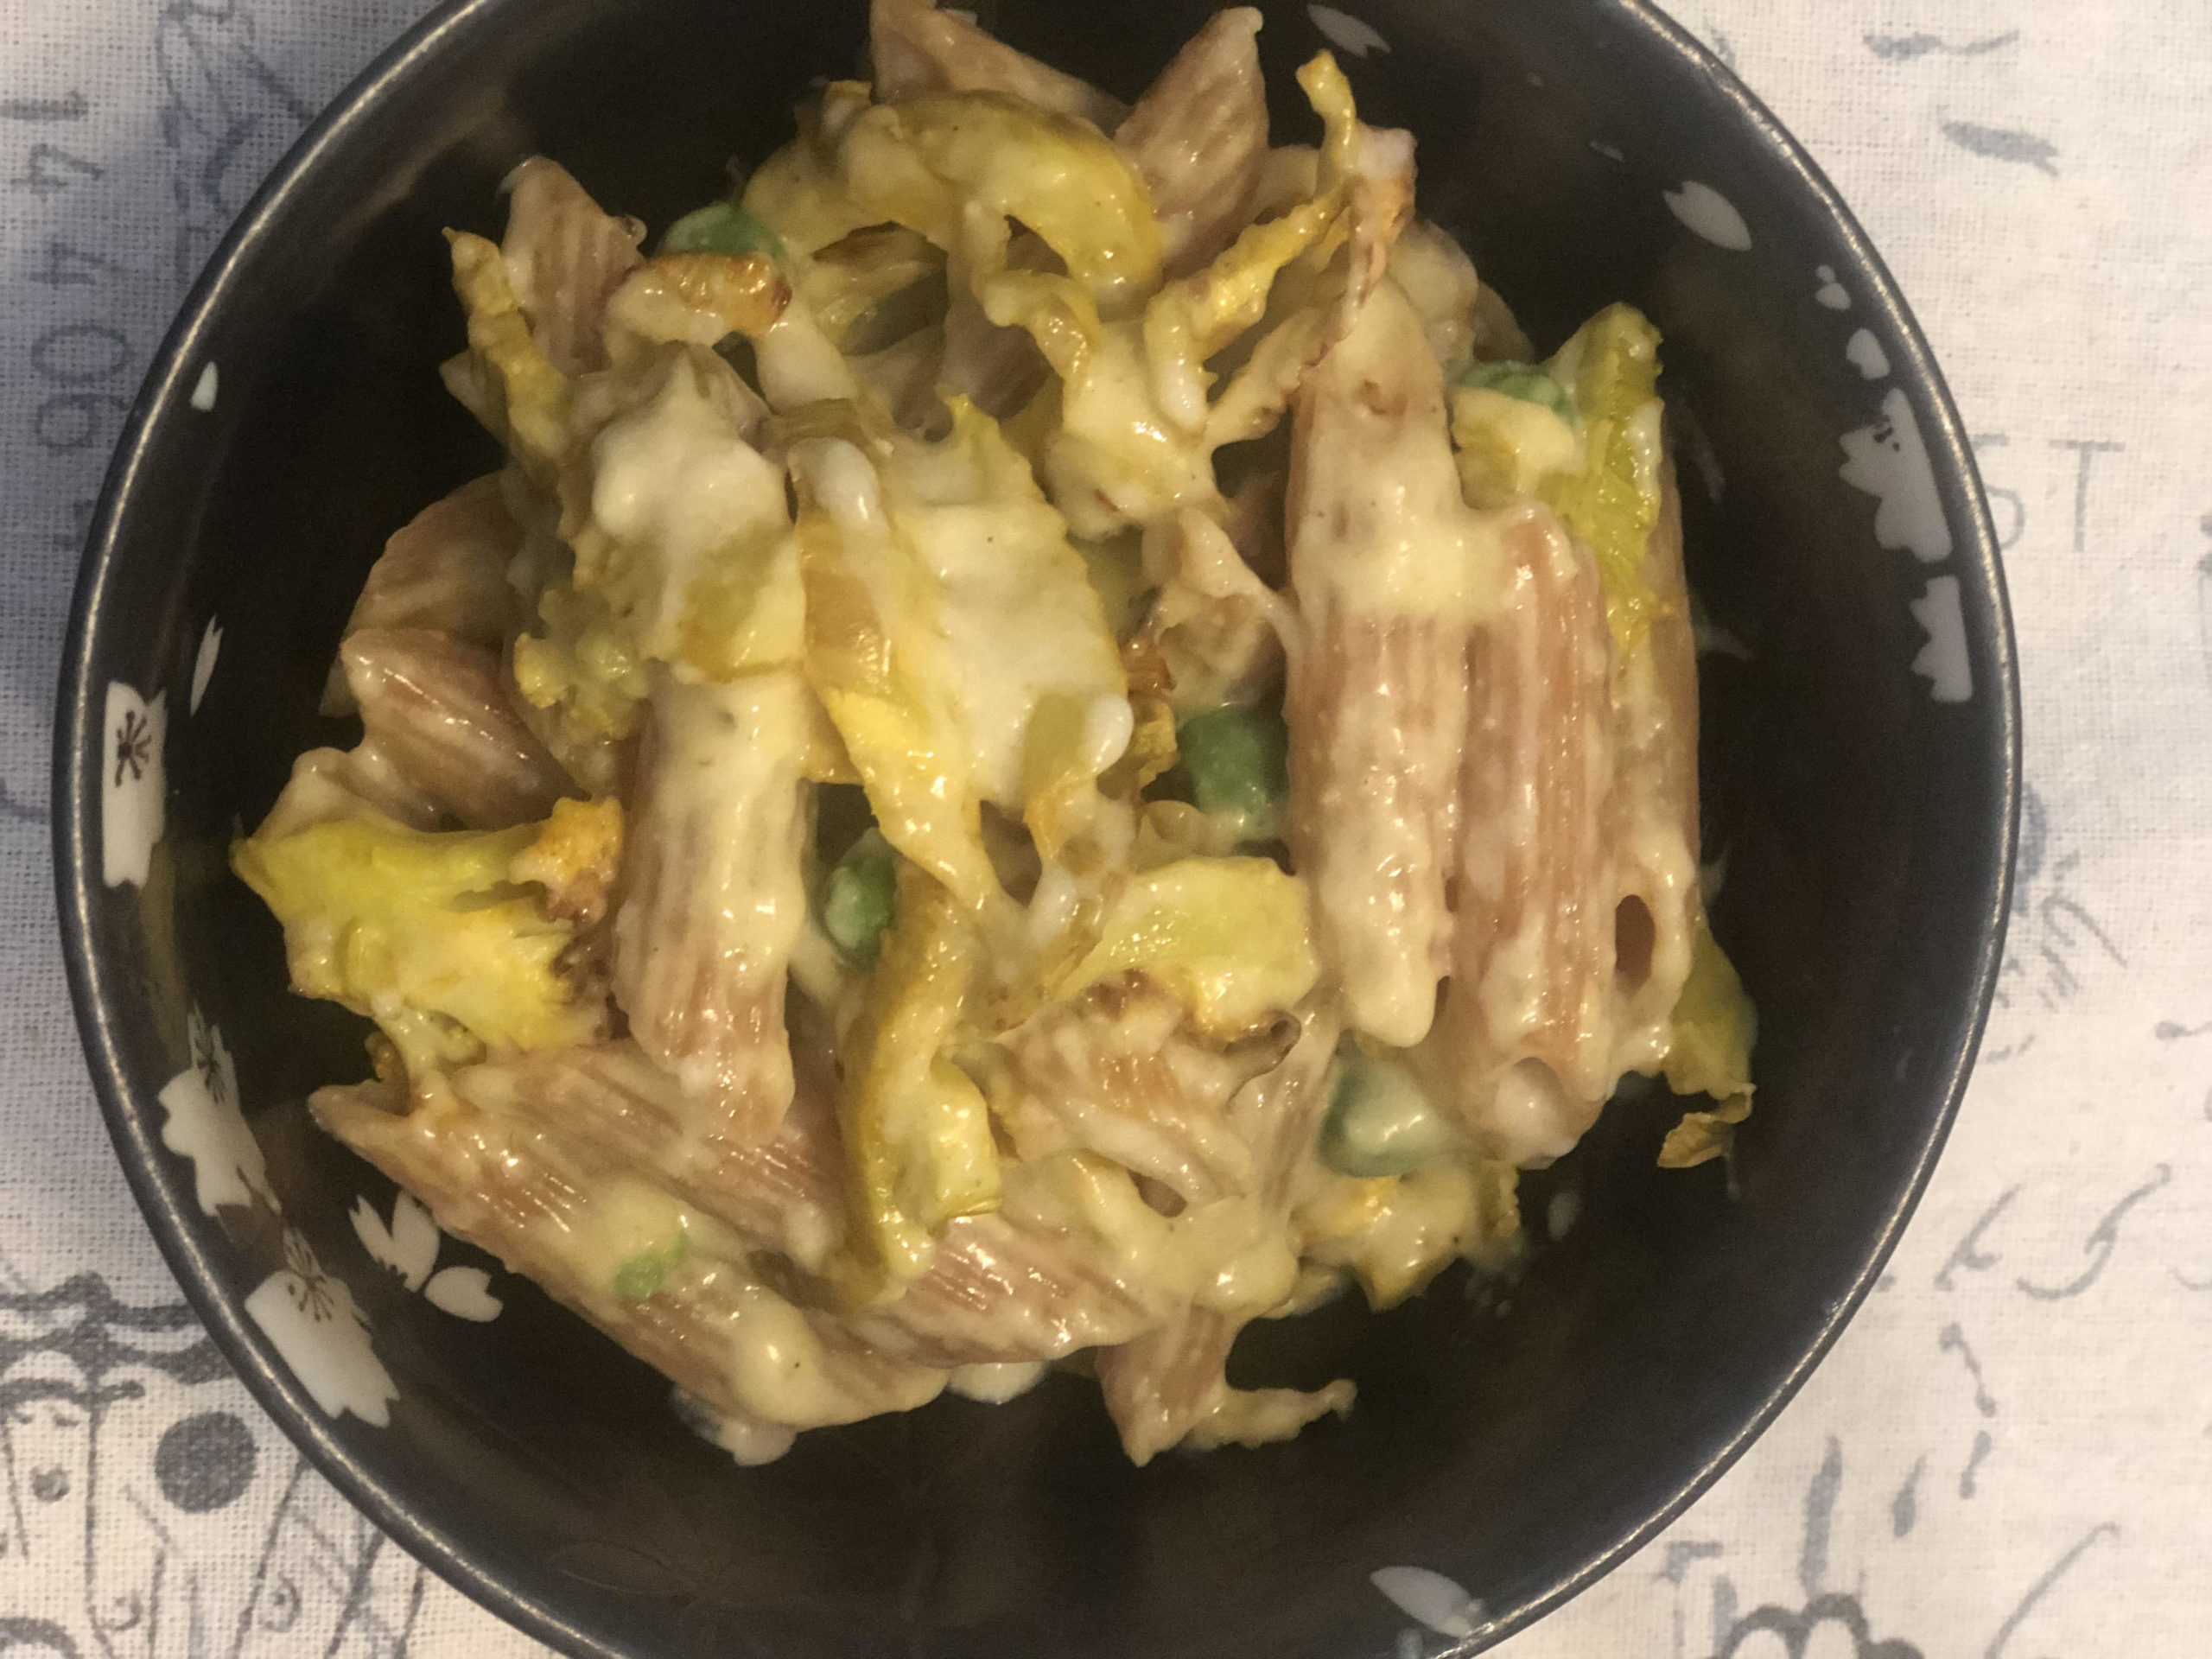
Vegan Style Cheese Sauce with green lentil pasta
Ingredients:
2 Tbsp coconut oil
2 Tbsp almond flour
1 1/2 cups Good Karma Flaxmilk with protein
1 1/2 cups vegan cheese
Salt & pepper to taste
green lentil penne
frozen peas (optional)
roasted fennel (optional)
Directions:
In a saucepan melt oil over medium heat. Stir in flour & saute for 2 minutes. Continue to stir & SLOWLY pour in the milk. Add the cheese. Continue to stir until melted. Add salt & pepper to taste.
I cooked up my pasta & added about 1 1/2 cups frozen peas 5 minutes before the pasta’s finished cooking. I had some roasted fennel cooking in the air fryer to mix in after the kids got their macaroni, peas & cheese!